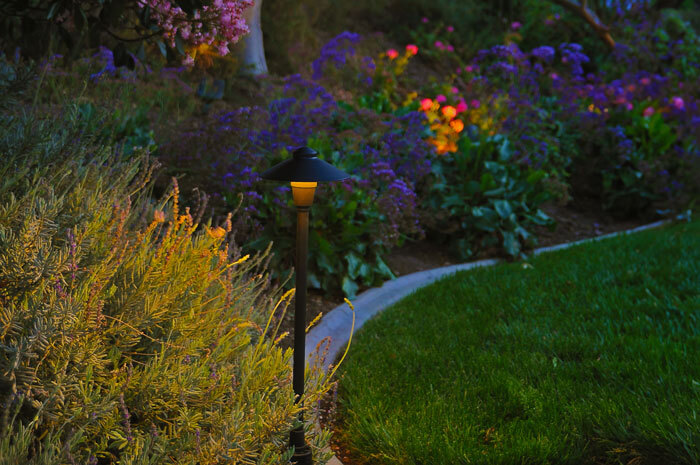
If you’ve ever been to a professional baseball or soccer game, you’ve likely seen the magic of lawn striping. No matter what you call it — lawn striping, lawnscapes, yard art, or anything else – those patterns make a striking impression.
If you’re wondering about how to stripe your lawn, you’re in luck. It’s not as hard as you might think! However, as with any great work of art, you must start with a good canvas — in this case, a healthy lawn. So, before learning about lawn striping patterns, or even going over what lawn striping is, it’s important to think about what type of grass you have, and what sort of condition it’s in.
Is Your Lawn Fit for Striping?
Before you consider striping your lawn, make sure it’s in good condition. You’ll need to have dense, lush grass, as you won’t be able to make lawn striping patterns in dry, brittle grass. To make sure your lawn is thick and healthy, you should water your lawn frequently, remember to fertilize, and never cut off more than one-third the height of the grass at a time.
An easy rule of thumb to determine if your grass is ready: if your mower’s wheel tracks are highly visible on your lawn, it’ll be good for striping. If the wheel tracks don’t make much of an impression, your lawn won’t stripe well.
You’ll also want to consider what type of grass you have, as certain varieties are better suited for lawn stripe patterns.
Cool season grasses found in northern areas are usually good for striping.
Warm season grasses found in southern areas usually produce less pronounced striping.
Transition-zone grasses found in the narrow-belt region can produce good striping in some areas and some portions of the growing season, while producing poor striping in other areas or portions of the season.
It’s important to note that some grass types produce better striping contrast when cut short, while other grass types can provide better contrast when cut high. Try experimenting with what works best in your situation.
What is Lawn Striping?
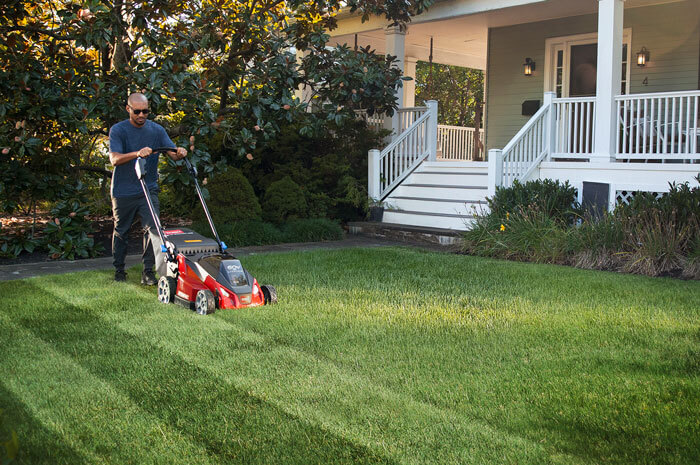
So, exactly what is lawn striping, and how does it work? While normal mowing produces faint lines, specialized mowers, like Toro’s Stripe mower with built-in mowing technology, or lawn striping tools, such as the Toro Lawn Striping System, are designed to make stripes and designs far more vivid and visually pleasing. The Toro Lawn Striping System attaches to the mower and uses weighted rollers to bend the grass in a specific direction, creating light or dark stripes. This attachment allows you to create patterns, from simple stripes to the most advanced works of art.
Learn How to Stripe Your Lawn
Once you have your lawn in order and your attachment hooked up, or your striping mower prepped to go, you’re ready to stripe. Before you start, consider the viewpoint of your design. If your property has a focal point, or a viewing location, mow in a pattern that is generally to and from that observation point. Grass bent toward you appears darker, grass bent away from you appears lighter, and the contrast of striping is less visible when looking across the mowing direction.
Stripes are also more visible with the sun to your back, allowing sunshine to reflect off the blades of grass to emphasize light and dark stripes. Lawn stripe patterns that run east-west have a greater contrast than north-south patterns. They’ll also be more visible in the mornings and afternoons, when the sun is at an angle.
Another important part of how to stripe your lawn: large, flat areas usually provide better striping contrast than slopes or areas with a lot of trimming and edging. If you do stripe over slopes, make sure they’re not wet — although mowing in morning dew can actually produce good striping contrast.
How you mow can also affect your ability to stripe a lawn — specifically, what you do with your grass clippings. A side-dispersal of clippings can hide striping, reducing the contrast effect, while mulching often displays excellent contrast, enhancing the effect of striping. Bagging can also negatively impact your striping, with heavy wheel tracks taking away from the effect.
Repeating your striping patterns will help them be more visible and vibrant over time, so it’s important to figure out what sort of pattern you’d like to commit to. Start thinking about what sort of lawn stripe patterns you’d like. Some basic lawn stripe patterns include the Straight, Wave, Checkerboard, and Circle patterns. To create these designs, simply follow these easy step-by-step instructions:
Striping in a Straight Pattern
1. Cut the perimeter of your lawn (two passes are recommended to allow for consistent turning and clean visual patterns). This can be done with or without the striping attachment.
2. Keep your eye on a ‘line of sight,’ such as a tree, post, or flag pole, while mowing your first strip to ensure that your alignment is straight.
3. Continue to mow stripes running parallel to the first.
Striping in a Wave Pattern
1. Cut the perimeter of your lawn (two passes are recommended) with or without the striping attachment.
2. Mow your first stripe with a smooth, waved pattern, attempting to keep turns subtle and consistent throughout the design. Remember to keep a line of sight as a reference, preventing the initial stripe from veering off course.
3. Continue to mow wavy stripes running adjacent to the first.
Striping in a Checkerboard Pattern
1. Cut the perimeter of your lawn (two passes are recommended) with or without the striping attachment.
a. Helpful hint: Pick a central line of sight for your pattern, then plan for your stripes to run at a 45 degree angle from it in either direction.
2. Keep your eye on the line of sight, cutting a diagonal stripe across your lawn.
3. Continue to mow stripes running parallel to the first.
4. Mow a second pass running perpendicular to the first, crisscrossing over the original stripes. This will create a checkerboard effect.
Striping in a Circle Pattern
1. Cut the perimeter of your lawn (two passes are recommended).
2. Start in the innermost point of your circle.
3. Mow additional rings around the inner circle to expand the pattern, alternating directions for each new layer.
Helpful hint: This pattern works best around trees or flagpoles. Your turning points may cause blemishes in the pattern, but these will get fixed as you create the next ring.
Tips & Tricks:
- Keep mower blades sharp for a clean cut.
- Try not to mow when the grass is wet, as it can cause a “matting” effect.
- Do not mow under extreme heat or sun.
- Do not assemble, disassemble, attach, or inspect the Striping System while the mower is running.
- Before beginning, consider the viewpoint of your design such as the center of your sidewalk, driveway, or street.
- Never cut off more than 1/3 the height of your grass at one time.
Putting It All Together
Now that you know how to stripe your lawn, you’re ready to start making beautiful, eye-catching lawn stripe patterns! Just make sure that your grass is dense and lush, and that you’re following the best practices you’ve just learned.